Quick
Start on PDFill PDF Editor
PDFill is very easy to use! The interface looks like the
combination of Adobe Reader and Microsoft Word. You can have a new project to
open a new PDF file or resume the saved project to continue your
editing work. The following are the steps on how to use PDFill PDF
Editor.
Step 1: Start PDFill
PDF Editor
- From Your desktop, click the icon
of "PDFill PDF Editor".

You will see a screen like this:

If you use a
tablet PC, click
 for the
PDFill Options on
Tablet PC.
for the
PDFill Options on
Tablet PC.
Step 2:
Create
New or Resume PDFill Project
(You must save the project file for later editing)
-
-
To create a new blank PDF file to
insert image, texts, PDF form fields or scan an image, select
Menu
File
> New Project with Blank Page.
-
To resume a saved project, select Menu
File >Open an Existing Project. Or, click
 from Toolbar. Select
a PDFill Project (pfl) file to open. from Toolbar. Select
a PDFill Project (pfl) file to open.
Step 3: Start PDF Editing


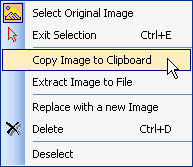
Select
 first
to popup the Redaction/Eraser Menu: first
to popup the Redaction/Eraser Menu:

-
PDF Form Filler: Fill a
PDF Form
Select
 first. Use
left mouse button to click inside the form field to select and edit it.
or, Use
Tab or Shrift+Tab to select fields. first. Use
left mouse button to click inside the form field to select and edit it.
or, Use
Tab or Shrift+Tab to select fields.
-
PDF Filler: Insert new
Text,
Check, Image, Hyperlink, Whiteout or Highlight.

-
PDF Form Maker:
Insert a new PDF form field of Text
Box, Check Box, Radio Button, Combo Box, List Box, Push Button
and Digital Signature.

There are 5 tutorials for PDF
Form Maker:
-
PDF
Drawing: Draw
Line, Arrow, Rectangle, Circle,
Arc, Pie, or Curve

-
PDF Comment and Annotation:
Insert Stamp, Text Box, Highlight, Sticky Note, Pop Up,
Attachment, Play Video, Line, Arrow, Rectangle, Oval, Polyline,
Polygon, Cloud, Pencil Drawing, and 3D UCD file.

-
PDF Ink:
Write, draw,
mark or highlight PDF documents with pen input or mouse.

-
PDF Document
Management:
Insert, Replace, Delete, Renumber, Extract, Rotate and Crop PDF
Pages, Deskew, Add Bookmark, Header, Footer, Watermark, Attachment, Action,
JavaScript and Digital Signature.

-
To modify an object, select first. Use left mouse button to click
inside field to select and edit it.
-
To change the properties of the selected object,
Press Key "F4", Menu Format => Current Object's Properties,
or Click
 . .
-
To align objects, please
select the Align Tool
 . .

-
To change the view, Select zoom in/out, Pan from here:

Step 4: Save all
Editing into a new PDF and Project
File
-
To save the edited PDF, select Menu
File
> Save PDF. Or, click
 from Toolbar. Then, select your options
and save all editing into a new PDF file. from Toolbar. Then, select your options
and save all editing into a new PDF file.

- To save this project, select
Menu
File >
Save Project or click
 from Toolbar.
Please save the project often. from Toolbar.
Please save the project often.
You must
save editing into a project file (PFL) so that you can resume
editing later.
|